
Turn one ordinary pumpkin into a classic jack-o-lantern with triangular eyes and a broad smile. This beginner project uses a simple design, a pumpkin-carving kit, and a battery-powered light. Allow about 60 minutes, including preparation and cleanup; this is an editorial estimate, and a thick pumpkin or careful first attempt may take longer.
Safety first: Adults should do all cutting. Children can help draw the face and scoop the pumpkin while cutting tools are put away. Work on a stable, well-lit surface, keep hands out of the blade's path, and use an LED light rather than an open flame.
Hero image: AI-generated illustration of a simple finished jack-o-lantern; your pumpkin and cut shapes will vary.
Choose a forgiving design
Start with two large triangles for eyes, a smaller triangle for the nose, and one wide smile. Leave generous strips of pumpkin between the openings. Avoid thin teeth, tiny stars, and elaborate curves on your first attempt. You can draw the face directly or tape on a simple paper pattern.
Common mistakes and quick answers
The saw keeps catching. What should I do? Stop pushing. Gently withdraw it, check that the wall is scraped to about 1 inch thick where you are carving, and restart with short, light strokes. Keep the blade roughly perpendicular to the pumpkin wall. Do not twist or force it around a tight turn.
A cut piece will not come out. Check that the cut meets all the way around, especially at corners. Recut the joined area gently instead of pushing hard enough to crack the face.
Can children carve this? Keep cutting as an adult task. Children can choose the expression, draw the pattern, and scoop with supervision while blades are safely set aside.
Should I open the top or bottom? This tutorial uses a bottom opening, following Pumpkin Masters' suggested method. It keeps the stem intact and lets you lower the pumpkin over an LED. Support the pumpkin securely while making the opening; do not cut while holding it in your lap.
How long will it last? That varies with the pumpkin and conditions. Carve close to your display date, keep it cool and out of direct sun, and discard it if it develops mold or becomes soft or unstable. Do not rely on a fixed number of display days.
Why this tutorial now
A Google Trends check on October 17, 2026, showed the related rising query “easy pumpkin carving ideas” up 50% under “pumpkin carving,” using United States, past 7 days, all categories, Web Search. This is a related-query signal, not a claim that the main topic rose by 50% or appeared in Trending Now.
Sources
- Pumpkin Masters: Tips and Tricks — bottom opening, wall preparation, patterns, and carving technique.
- U.S. Consumer Product Safety Commission: Halloween safety tips — adult-only cutting and battery-operated lighting.
- Google Trends comparison — live results change over time; the observation above is dated.
Optional carving supplies
Use a suitable manual pumpkin-carving kit you already own; no particular brand is required. If you need one, the Pumpkin Masters Premium All in One Carving Kit includes hand saws, a scoop, a jumbo drill and patterns. You do not need to use every tool or pattern for the simple face below. This is a listing-based suggestion, not a hands-on product test. Adults should operate all sharp tools in this tutorial, follow the supplied instructions, and keep children away while cutting.
As an Amazon Associate I earn from qualifying purchases.
View the Pumpkin Masters Premium All in One Carving Kit on Amazon. Confirm ASIN B074V6JBMY, the included tools, seller and current delivery terms before ordering.
See the manufacturer carving tips for gentle sawing technique. A battery-powered light is still needed for an illuminated display; do not assume one is included in this kit.
More Halloween ideas
Prefer to leave the pumpkin intact? Follow our pumpkin painting tutorial without carving. For something to wear, try the closet-first last-minute Halloween costume guide.
If you are also setting up an indoor treat table, see our Bico Spider Web Halloween candy bowl review for dimensions and practical serving considerations. Keep the carving workspace separate from food.
What you need
- One firm medium pumpkin with a stable base and a smooth area for the face
- Pumpkin-carving kit with a small serrated saw and scoop; adults operate all cutting tools
- Washable marker and optional paper face pattern with tape
- Bowl for seeds and pulp
- Protective table covering, nonslip mat, and a damp cleaning cloth
- Battery-powered LED tea light with secured battery compartment
Steps
-
Prepare a stable workspace. Cover a well-lit table and place the pumpkin on a nonslip surface. Wipe the pumpkin and dry your hands. Check that it is firm, without soft or moldy patches. Set a bowl nearby for waste and choose the smoothest side for the face. Keep children away from the cutting area.
-
Make a bottom opening. An adult should support the pumpkin securely on the work surface and use the carving kit's saw according to its instructions to cut an opening in the bottom large enough to reach inside. Keep the supporting hand clear of the cutting line and use controlled strokes. Remove the cut section. Stop and reposition if the pumpkin rocks or slips.
-
Scoop and scrape. Put the cutting tools away before inviting children to help. Remove seeds and stringy pulp with the scoop. Scrape the inside of the planned face area until the wall is roughly 1 inch thick, without making it flimsy. Clear loose pulp from the bottom opening and wipe up slippery spills.
-
Mark a simple face. Draw two triangle eyes, a small triangle nose, and one broad smile with a washable marker. Leave wide, uncut spaces between the shapes for strength. If using a paper pattern, tape it flat against the pumpkin and transfer the outline using the kit's instructions. Remove the paper before sawing so the lines are easy to see.
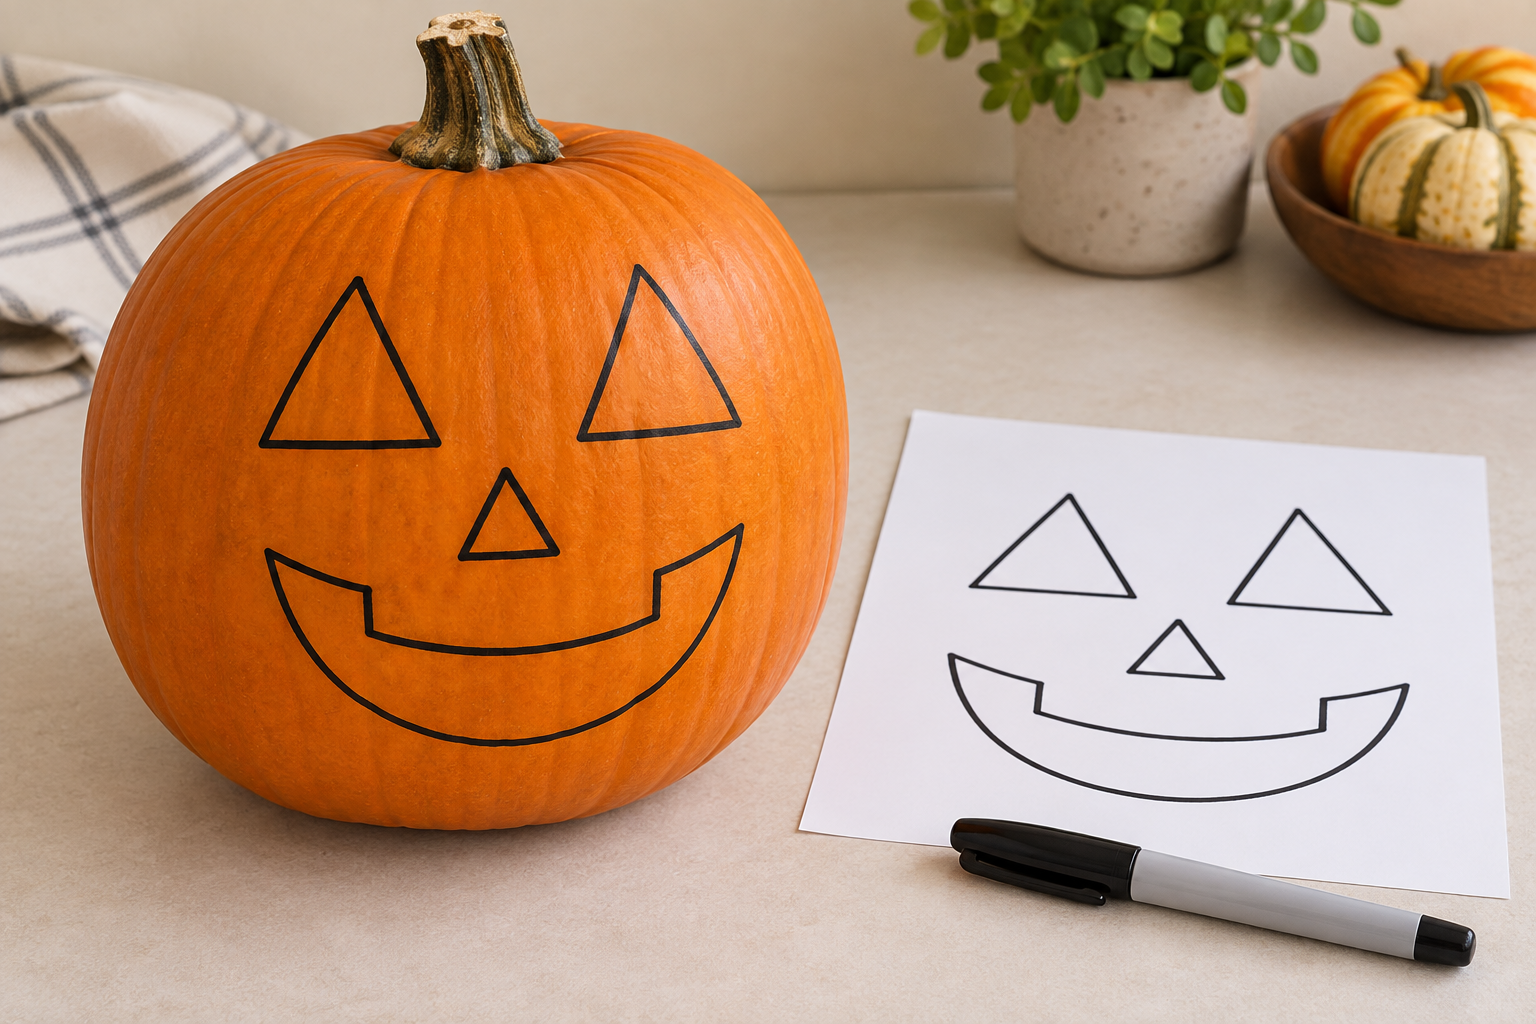
AI-generated illustration: plan a simple face with wide spaces between the openings.
-
Carve the small features first. An adult should cut the nose and eyes before the larger mouth, keeping the blade approximately perpendicular to the wall. Use gentle, short back-and-forth strokes along each line. Withdraw and reposition at sharp corners rather than twisting the blade. Keep the other hand away from the blade's possible exit point, including inside the pumpkin.
-
Cut the smile and release the pieces. Saw the mouth outline slowly, then check that every cut joins. Gently ease each cutout free; if it resists, inspect and finish the cut instead of forcing it. Tidy loose strands with the scoop and wipe away visible marker. A broad, slightly uneven smile is fine for a first pumpkin.
-
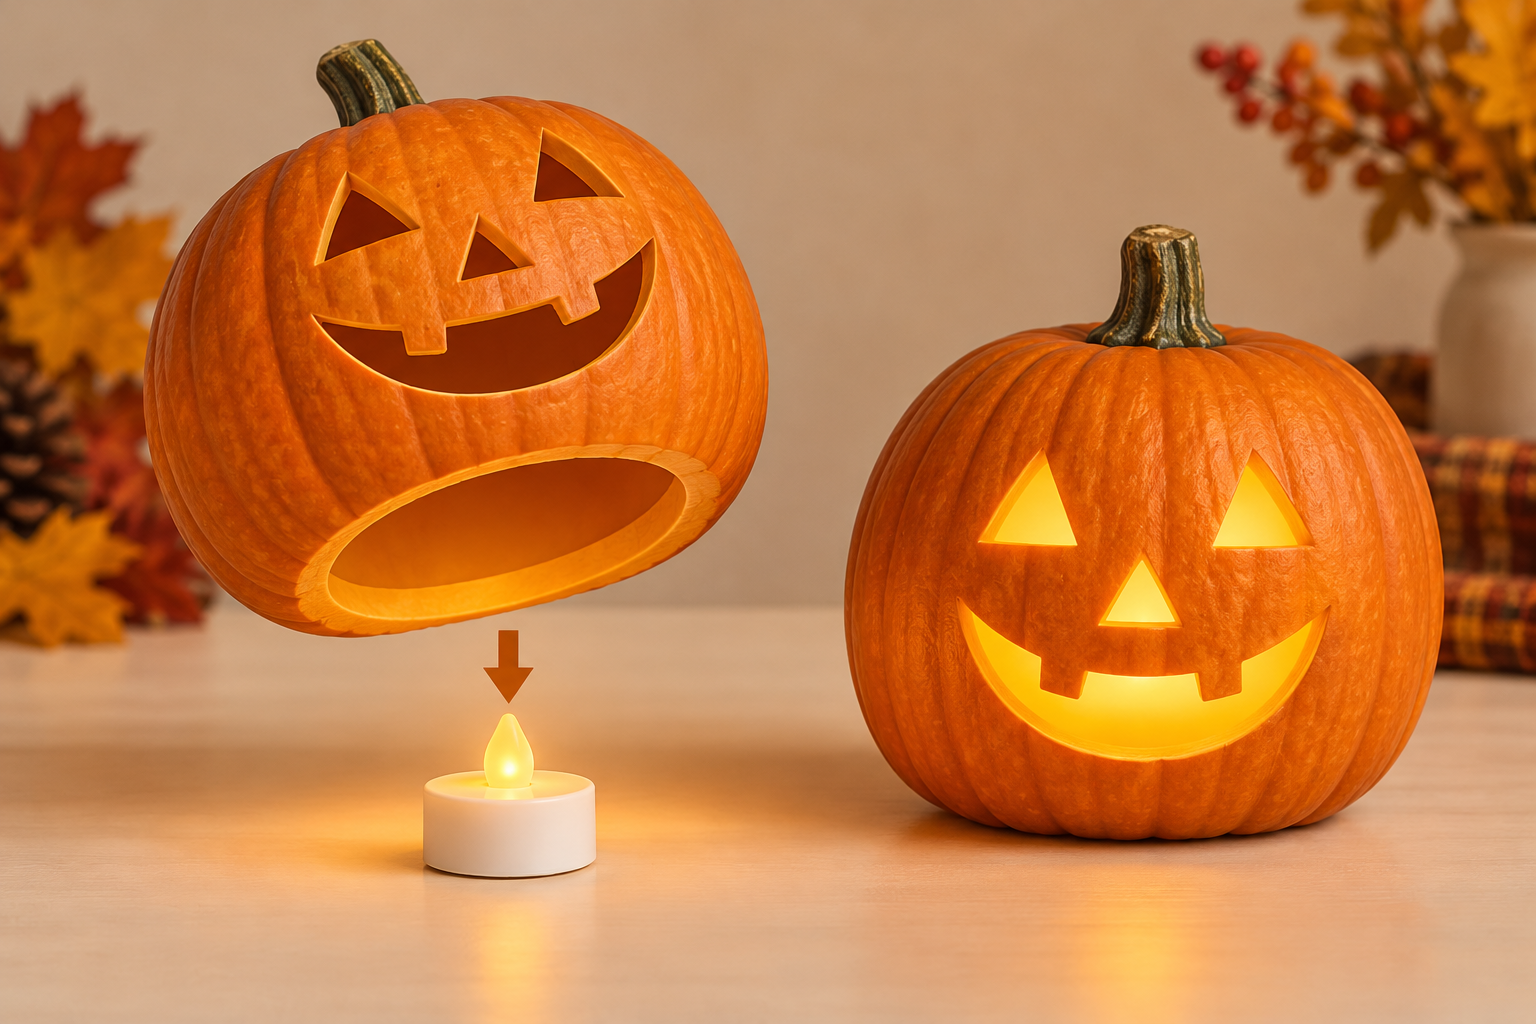
AI-generated illustration: lower the bottom opening over a battery-powered LED tea light; use no open flame.
Light it and clean up. Place a battery-powered LED tea light on a level display surface and lower the pumpkin over it. Check that it stands securely and the light is suitable for your display conditions. Use no candle or open flame. Keep the display away from walkways, safely store all tools, and wash the work surface and hands.