To cook regular long-grain white rice in a saucepan, measure the rice and water, bring them to a boil, then simmer gently under a tight-fitting lid until the grains are tender. For the example below, use 1 cup rice and 2 cups water, but your package directions take priority.
This small batch makes about 3 cups cooked rice. Allow roughly 10 minutes of active work and 25–30 minutes overall; these are planning estimates, not hands-on test results. The method is for ordinary uncooked white rice, not instant, brown, parboiled or sushi rice.
A plain pot of rice is a useful starting point when you want a simple side without a long ingredient list. If avoiding wheat for an allergy or another dietary need, check the rice package and every added ingredient, and prevent cross-contact. See our guide to checking packaged-food labels for wheat.
Hero image: AI-generated generic illustration of cooked rice, not a photograph of a tested recipe.
What you need
- 1 cup regular uncooked long-grain white rice; water amount specified on its package (2 cups in this example)
- 2–3-quart saucepan with a tight-fitting lid, measuring cups and a fork
- Timer, dry oven mitt and heat-safe trivet; shallow containers for leftovers
Steps
-
Check the rice and measure the batch
Read the bag for its water amount, cooking time and rinsing directions. Use 1 level cup of regular long-grain white rice with 2 cups water only when consistent with that product. Many enriched U.S. white rices do not need rinsing; washing can remove added nutrients. If the package says to rinse, follow it.
Wash your hands and use clean equipment. Choose a 2–3-quart saucepan with room for the rice to expand and a lid that fits securely.
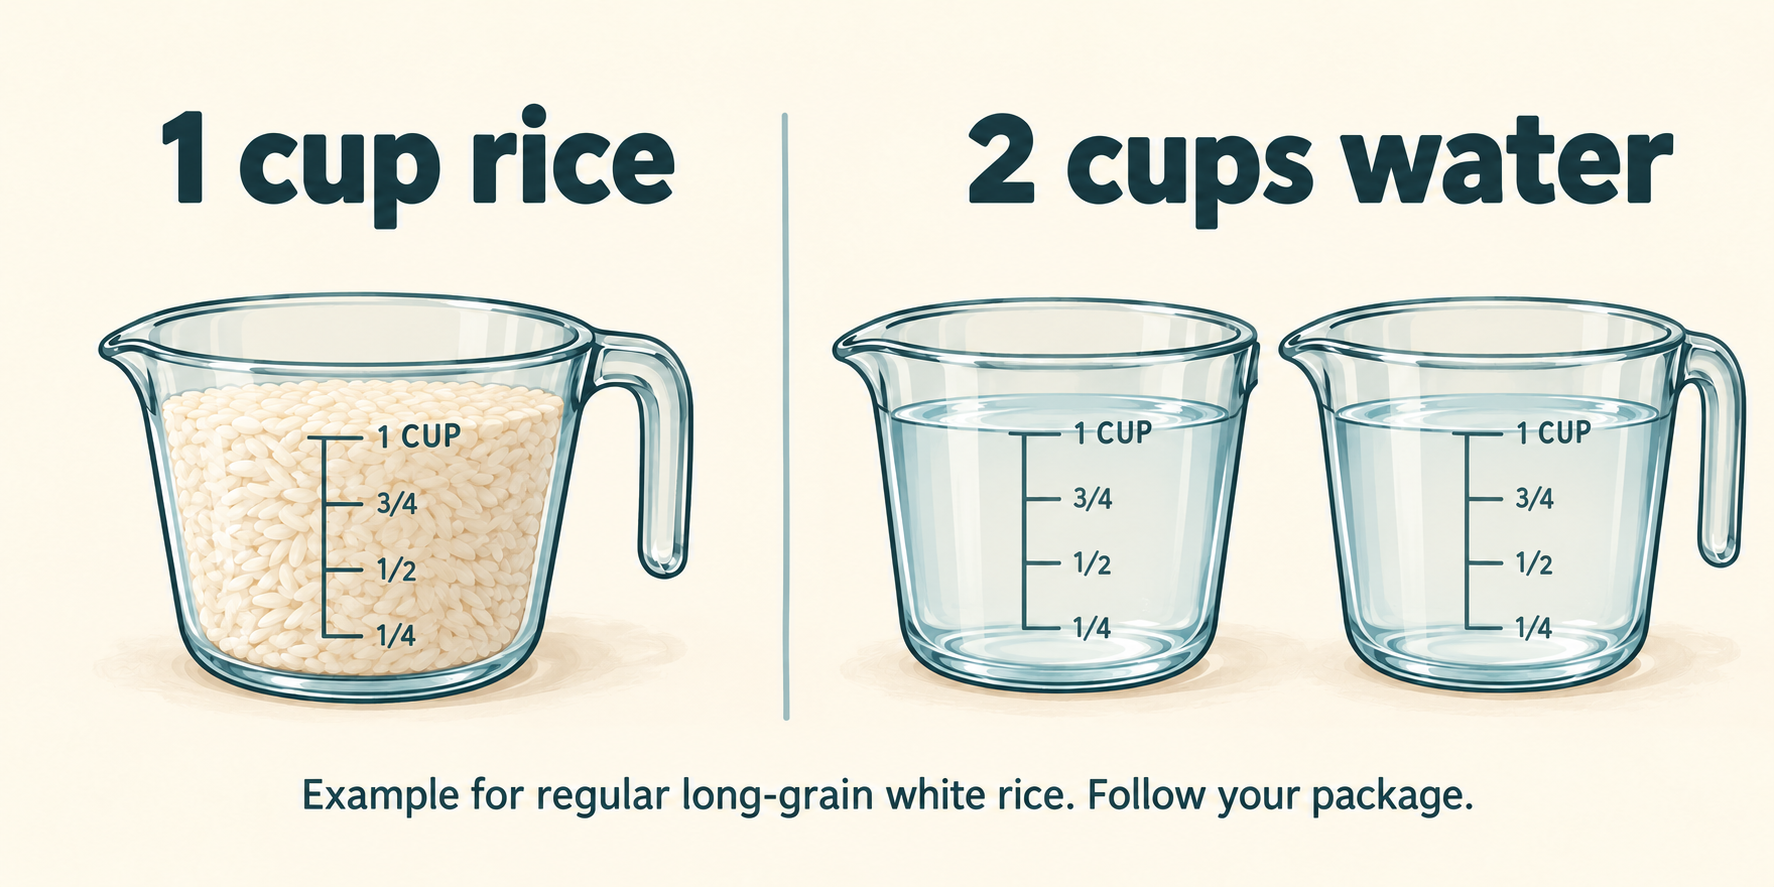
AI-generated illustration: example 1:2 ratio by volume; use your package’s instructions.
-
Bring the rice and water to a boil
Put the measured rice and cold water in the saucepan. Add a small pinch of salt if you want it, or leave the rice plain. Heat over medium-high until the water boils, then stir once to distribute the grains.
Turn the handle inward without placing it over another burner. Keep a dry oven mitt nearby and stay at the stove while the water comes to a boil.
-
Cover and lower the heat
Reduce the heat to low, fit the lid and start the package’s timer. Regular long-grain white rice often needs about 15–20 minutes. Aim for a gentle simmer, not a vigorous boil. Leave the lid on and avoid stirring during cooking.
If foam starts escaping, lower the heat. Do not press a lid down with your hand or add a weight to it. The goal is controlled heat, not sealing the pan like a pressure cooker.
-
Check for tenderness, then fluff
At the end of the suggested time, lift the lid away from your face so escaping steam stays clear. The rice should be tender with no pool of water. If still wet, replace the lid and cook on low for another 2–4 minutes. If hard and dry, add a little water, cover and continue gently.
Once cooked, turn off the heat and move the pan to a heat-safe surface. Follow any package resting time, then separate the grains gently with a fork. Serve promptly.
-
Cool and refrigerate leftovers promptly
Transfer extra rice into small, shallow containers rather than leaving a deep saucepan to cool on the counter. Following the UK Food Standards Agency’s conservative rice-specific advice, chill it quickly, ideally within 1 hour, and eat refrigerated rice within 24 hours. Keep the fridge at 40°F (4°C) or colder.
Do not leave perishable food out beyond 2 hours total, or 1 hour above 90°F (32°C). Discard rice left out too long; reheating and a normal smell do not establish safety. Reheat rice only once, until steaming hot throughout, and eat immediately.
Troubleshooting
- Mushy grains: check the exact rice type and measurements next time. More stirring does not dry it out.
- Scorched bottom: do not scrape burnt grains into the rest. Next time, use a gentler simmer and a correctly sized burner.
- Repeated hard centers: check the lid fit and package timing before changing the water ratio.
Frequently asked questions
Is the 2:1 water ratio universal?
No. Varieties, processing and cooking methods differ. This example is for regular long-grain white rice; follow the particular bag rather than applying it to every rice.
Do I need butter or broth?
No. Water makes a plain side. Optional additions change flavor and may introduce allergens, so check their labels.
Can I use this rice for sushi rolls?
It will not cling like short-grain sushi rice. Our cucumber-and-avocado sushi tutorial covers that separate method.
Sources and topic selection
This original beginner guide is research-based, not a claim of recipe testing. Sources checked October 30, 2026: University of Maryland Extension’s saucepan method, USA Rice’s cooking ratios and technique, Carolina’s regular long-grain white-rice instructions, and Carolina’s cooking troubleshooting. Storage guidance: Food Standards Agency rice advice and FDA refrigerator and time limits.
Trend context: checked October 30, 2026, around 19:57 UTC on Pinterest Trends, United States. “Wheat-Free Diet” showed Pin saves up 300% versus the previous month; its August 4–October 27 historical chart rose into the latest endpoint. This is a saving/engagement signal for a broad food topic, not growth in rice searches or proof of overall demand. It inspired this practical pantry-cooking tutorial, not a recommendation that everyone avoid wheat.